perlovka.org
Help
Configuring The Bat! v 2.0 on Windows to work with perlovka.org mail server
Introduction
Perlovka.org runs Cyrus IMAP server. For general information on using an IMAP server please go here
Our mail server provides two ways to access the IMAP server: secured and un-secured. Unsecured means - your messages theoretically could be intersepted, but not your username and password - they are transmitted with encryption.
Configuration steps
Here are the steps you would need to do.
1. Select "Accounts" --> "New..." from the menu. This will bring up the account creation dialog. Name the account the way you want it:

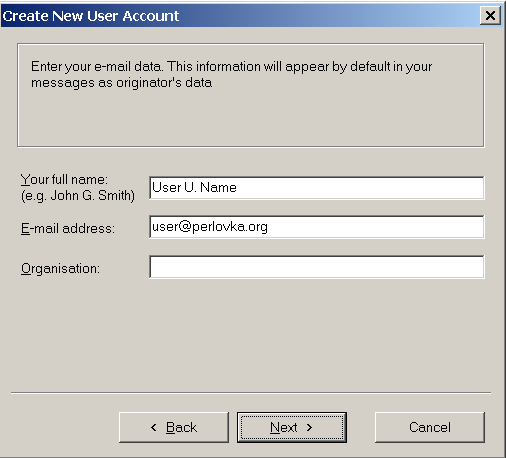
2. Click on "Next" button to continue. Next dialog will appear. Please enter your full name, e-mail address and organisation (if you want it to appear as a part of your e-mail address):
3. Select "IMAP - Internet Messaging Access Protocol" as your mail access method. Set mail.perlovka.org
as your incoming (IMAP) and outgoing (SMTP) mail server.
Note that you have to check the "My SMTP server requires authentication for sending mail" check box.

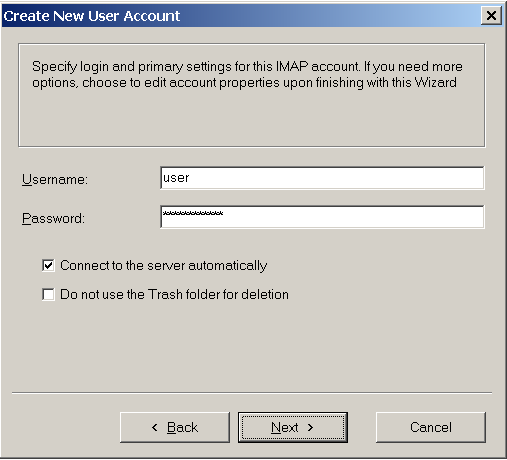
4. Enter your user name and password. Uncheck the "Do not use Trash folder for deletion" check box. Click "Next"
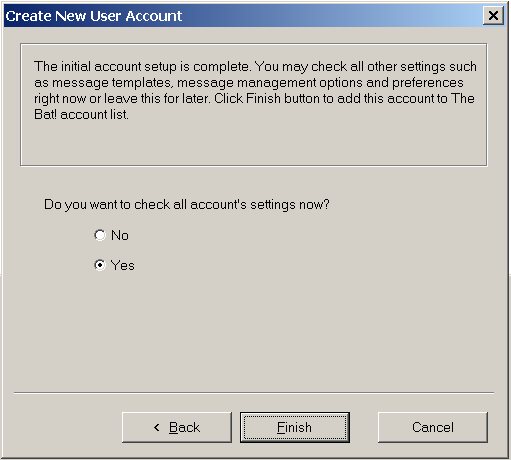
5. Answer "Yes" on a question "Do you want to review your account settings now?". Click "Finish" button.
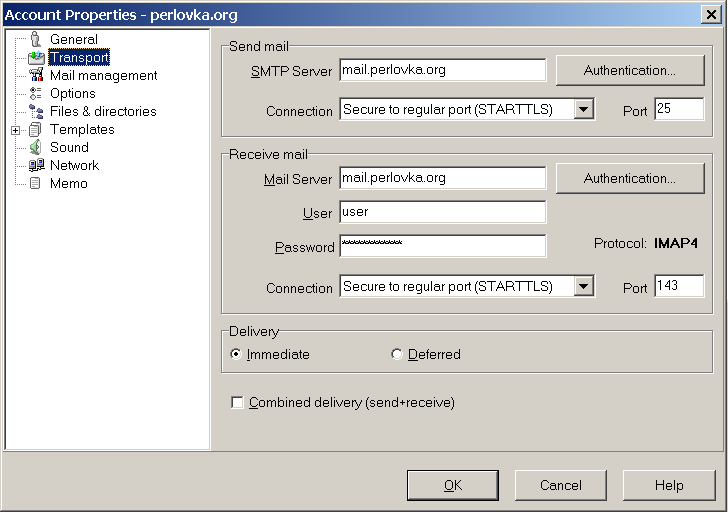
6. On the settings dialog panel, go to "Transport" pad. Select "Secure to regular port (STARTTLS)" in
"Send mail/Conenction" combo list box and either "Secure to regular port (STARTTLS)" or "Secure to
dedicated port (TLS)" in "Receive mail/Connection" combo list box.
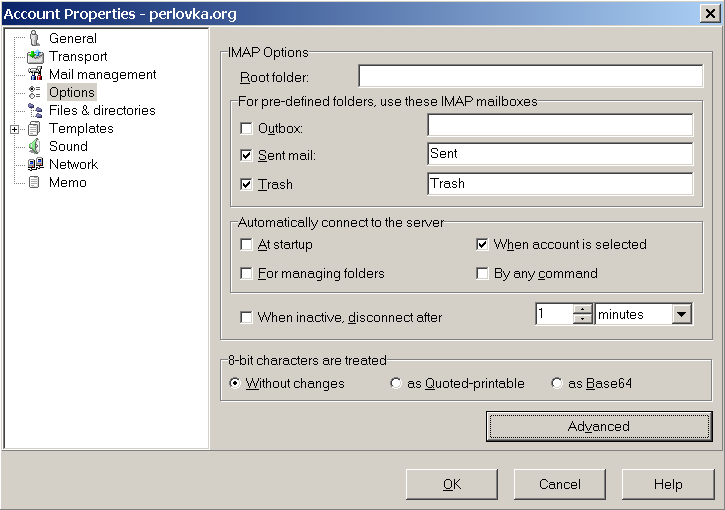
7. Go to "Account Properties" pad. Under "IMAP Options/For pre-defined folders, user IMAP mailboxes:", check "Send mail" and "Trash" check boxes. Enter the folder name "Sent" into "Sent mail" edit control and "Trash" into "Trash" edit control.
This is to make sure that all your mail clients, including web mail @ perlovka, use the same folder to store sent and deleted e-mails.
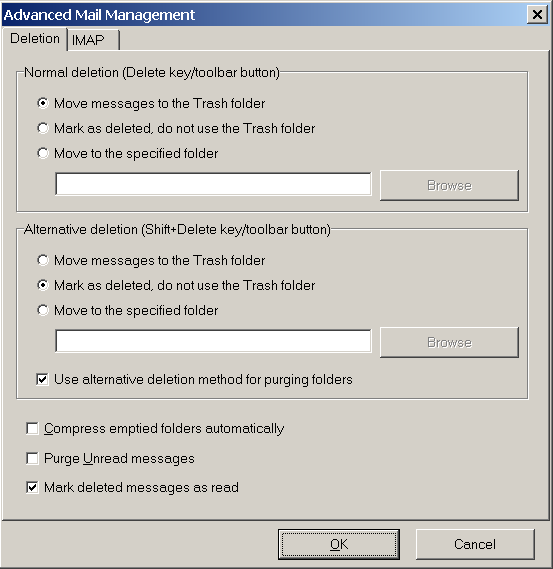
8. Click "Advanced" button and make sure that your "Normal deletion (Delete key/toolbar button)" is set to "Move message to the Trash folder" as specified on this picture of "Advanced mail management" dialog box. Click "OK"
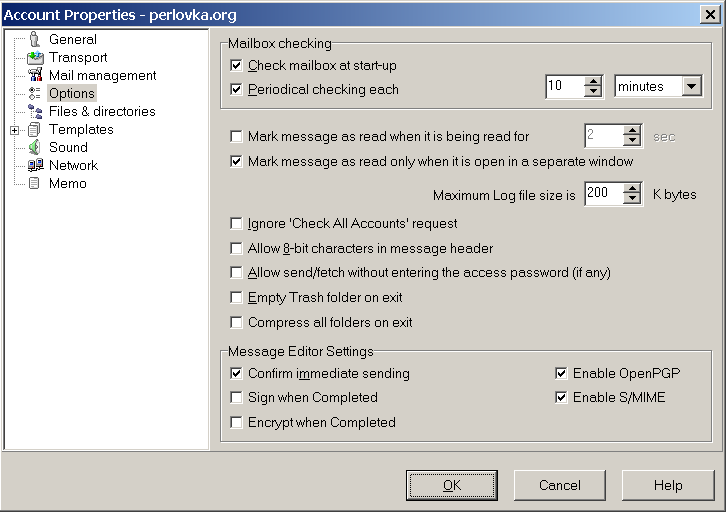
9. Set the options to the values that are the most appropriate for your network connection. However,
we strongly recomment to leave the "Allow 8-bit characters in message header" unchecked. Checking it
will definitely break the subject lines of your non-English e-mails.
10. Verify your information and click "OK". After you have successfully connected to the server, right-click
your new account and select "Manage IMAP fodlers" from a context menu.
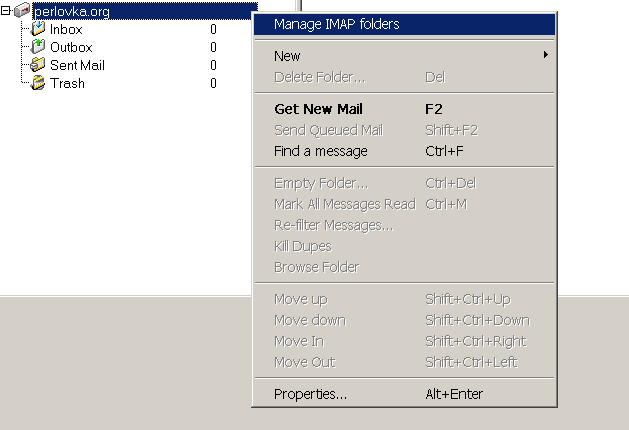
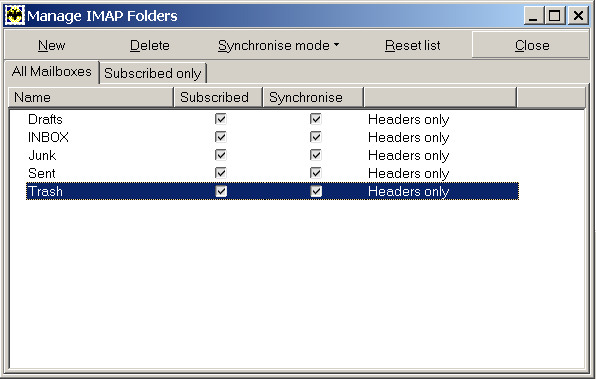
11. A new "Manage IMAP Folders" window box will appear. Check "Drafts", "INBOX", "Junk", "Sent" and "Trash"
to subscribe to these functions. Depending on whether you are planning to save a local copy of the message,
use one of the six options available in the "Synchronization mode" pull-down menu. Typically choice would be
either "Headers only", "Full messages" or "New messages". When done, click "Close".
12. You are done.
©2003-2004 perlovka.org
